The Moment is Now

I spend so much time thinking about what next that I often don't notice what I am doing at the moment. I am working on relaxing my mind so I can be open to the flow. Seems like when I am creating something the hours in my studio fly by.

My creative process, great learning resources, and ways to help the planet by repurposing are the theme of this blog. You are about to enter "the world according to Jan." Hope you find it a-musing.

Sunday, November 14, 2010

Wire Weaving Madness Brings Success

No posts for a long time because somehow summer doesn't seem the time to be sitting at the computer.  With the garden, sunshine and just  the wonderfulness of being outside, who wants to write or even read a blah, blah, blog.  Now the rains are upon us and the holiday festivals are beginning so here I am writing again.  Also, I went to a baptism for my great niece a couple of weekends ago and my sister commented that she checked my blog and I had not been writing anything.  So here I go again.

The summer festival season was really a downer this year.  Seems like after buying food no one had any money to spend on jewelry.  The Scandia Festival in Junction City was bloody hot and I am giving up on that fair.  On the upside, I decided to take my basket weaving skills and try my hand at wire weaving.  There is a really good website http://www.gailavira.com/tutorials/  that has free wire weaving tutorials.  I practiced the basic weaves and made a number of bracelets to sell.  I also bought a few of her tutorials through her Etsy shop and was busy each night madly wrapping wire.  The instructions of the tutorials are wonderful and I highly recommend this site if you want to expand your skills.

Unlike beading not everyone can or even would want to do wire weaving.  But for me, it is a meditative practice that helps me focus on the moment.  If  you lose your focus, you will be ripping out the weaving. One of the great things about wire wrapping is you can do it while sitting in front of the TV.  After completing several different projects, I  felt confident to weave this Art Clay Silver Face I made a couple of years ago.  It was just sitting on my bench waiting for an inspiration.  I called this piece Elf Prince and someone snagged it up right away at the Alpine Holiday Festival yesterday.  Nothing like "beginners luck" to inspire me to keeping on wrapping.

Wednesday, May 19, 2010

Creating jewelry with recycled material

In the instructions for etching, I etched  a piece of copper with Asian letters on it.  I used some of that copper and tin to make this amulet..  Both of these metals are recycled making this a green product.
The word kind is stamped inside the necklace.  The idea is that you wear this word next to your heart and the energy of the word manifests in you and around you.  I fashioned the idea after a Tibetian prayer wheel which has been on my altar for twenty years.

Saturday, May 8, 2010

Making a mate from recycled tin


Another birthday to prepare for so this time a Tin Woman is made.  This friend is a guitar player and once played in a band called Dead Cat Swingers.  Her brother keeps buying her Sponge Bob stuff which is driving her nuts - hence the sign.  My friend is going to hang this completely recycled art doll from her rear view mirror.

Once again I used an old calendar for the head and put it on tin with Omnigel.  The cat with the guitar is also from a calendar and omnigeled to tin.  Some leaves make up her horns.  The same tin as the Tin Man make her dress and she has cookie tin legs and feet.  Her hands are also tin.

Small letters where stamped into tin to make the "Sponge Bob Sucks" sign.  Hey he is a sponge so of course he sucks or may be the word would be absorbs.

Sunday, April 25, 2010

Instructions for etching metal

Metal etching needs to be done outside so I like to wait for a nice sunny day.  I have this funky bench outside the Shiva shop so I gathered my supplies.

Etching recipe is two parts hydrogen peroxide to one part muriatic acid.  You need either a ceramic or plastic tube for this mixture.  Muriatic acid is used to clean concrete, but they didn't have it at the local Home Depot.  They did have it however at the local Fred Meyers.  Who knows what that was all about. Anyway obviously not too difficult to find the necessary ingredients for the etching solution. 

Next you need to get out some rubber stamps and some ink.  Statz on is the kind of ink to use because it needs to be a permanent type ink.  You can also draw images with a sharpie pen. Put masking tape on the back of the metal to prevent it from etching.  Place the metal in the plastic tub with the etching solution for about 15 minutes.  The longer you leave it in the more etched it will become.


The etching solution will turn an interesting green color.  Agitate the metal periodically.  Wear plastic gloves because you are dealing with an acid here.  When it is finished in the acid, take it out with tweezers and place in another container of water and baking soda.  No special recipe here but there should be enough soda that some minor bubbling action happens when you put the metal in it.

It won't look all that great when you take it out of this solution.  The ink will still be on the metal, so I use rubbing alcohol and a green kitchen scrubber to get it off.  I clean the front and the back with the scrubber.  You can use scotchbrite but I just use the ones from the dollar stores for this clean up.   The picture shows what the metal looks like after some initial clean up.

 When I cut this up to use for jewelry, I will tumble with stainless steel shot in my rock tumbler and then put a patina on it.  I may either torch patina it or use liver of sulfur.  I'll post a piece using some of the etched metal when I get it made.

 Here's another piece that I drew the Om symbol on just to see how it would come out.  I didn't really leave it in long enough so I wasn't too happy with the results.  I put it back in the acid bath for a while, but still not too happy with it.


When you are finished etching, pour the acid bath into the baking soda rinse.  There will be a lot of bubbling action as the acid neutralizes.  It is now safe to disposed of.  I just pour it out in the woods but you might not all have that option.  I am pretty certain the sink is fine since it can't be any worse than a drain cleaner. 


Saturday, April 17, 2010

Making a Tin Man Doll

I wanted to make my nephew the artist something for his birthday.  I looked in Linda and Opie O'Brien's book an got an idea for an art doll.  www.burntofferings.com

I found a picture of Van Gogh in an old calendar and attached it to tin with Omnigel..  I just used the gel as glue and added some layers on top to give it an oil painting feel   The top of his head was cut off so I made a hat from an Altoids lid and a strip off a Christmas tin.
It's tough walking on eggshells
I then cut his shirt out and added the arms like the template in the book.  His legs were some pastries on the front of another tin. I cut a couple of easter eggs off a tin and made them the feet.  All the components were fastened with mini eyelets with the exception of the head.  I used a pop rivet there because I wanted it to really be stable. He looked a little too Christmasy so I cut out a poster from a catalog and omnigeled it to his shirt.  I added another touch of the Christmas tin to match his hat.  Gotta have the outfit match ya know.  

A wirewrapped a tip of a paint brush since my nephew is a painter.  After a couple of tries with scrap wire I got a funky hand made for the other arm.  I stuck it through a hole and made a spiral on the opposite side to hold it in place.   

To add a hanger, I just ran some copper wire though a couple of eyelets.  Very fun and easy to make.  Also very green and postage was minimal.  So I now have another use for all those tins.

Thursday, April 8, 2010

Viking Knit Instructions

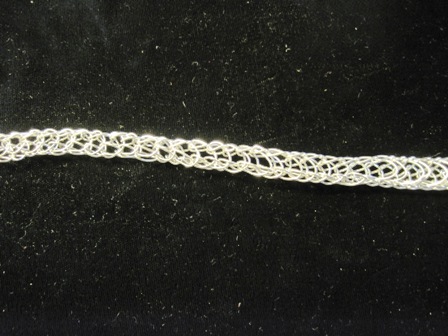
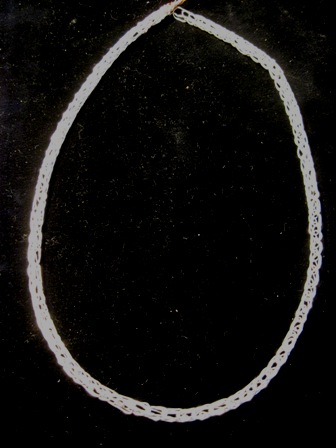
I decided I wanted to try my hand at Viking knit so I got on the web and found some instructions. Once I figured out how to fit it onto the flower I was off and running.  It really isn't too important to keep it straight while you are making it since the draw plate fixes all that.  Here is what it looked like when I finished "knitting" it.  Looks pretty scary really.  www.gailnettles.com/viking-knit/viking-knit-jewelry/


Here it has been pulled once through the draw plate.  Tightens things up and it starts to look better.

A few more times through the draw plate and it is actually starting to have promise.  Now I just needed to know how to finish it so back to the internet since I am more likely to make a finding than buy one.  The best site was the Beading Daily blog which had a nice way of finishing the chain off yourself. I found it by googling finishing viking knit.   Now I can watch TV at night and make things at the same time.

Monday, March 29, 2010

Twisted Sister Arts - Incredible Wire Wrap Artist

I was cruising through Etsy to see what was out there and discovered this terrific wire wrap artist.  Her stuff is amazing and very reasonable priced considering the work.  I was hoping she did tutorials, but she is so busy making stuff (plus that day job) she can't keep up.  Check out her stuff at http://twistedsisterarts.blogspot.com

When I e-mailed her she was very responsive and seemed like a great person willing to help out others who love to create.  I have been reluctant to try bold crazy designs because I didn't want to "waste" sterling wire, but found out there is a pretty good enameled copper wire with silver coat that is viable.  Just bought some from Beadalon even though I promised myself to stop spending money on materials.  Anyway the wire is  called Artistic Wire and will let you know how I like it.  Sometimes the coating is too thin, but this is supposed to be better because they put the enamel over it. I bought a really small gauge which will be new for me also because I am used to big and bold.. 

Raining like crazy here so I am off to organize the Shiva Shop and get out some books to see what I can create today.   Hoping to transfer some of those basket weaving skills into new jewelry.